{{#infoboxbuilder: | 0:Theme = MC1 default | 0:ToggleContentLongerThan = 1000
| 1:Type = Footer
| 1:Value =
| 2:Type = Line
| 2:Label = Chapter
| 2:Value =
| 3:Type = Title
| 3:Value = 07: Medical Emergency
| 4:Type = Image
| 4:Value =
| 5:Type = Line
| 5:Label = Objective
| 5:Value =
| 6:Type = Line
| 6:Label = Character
| 6:Value = Warrens
| 7:Type = Line
| 7:Label = Faction
| 7:Value = ?
| 8:Type = Line
| 8:Label = Enemy
| 8:Value =
| 9:Type = Line
| 9:Label = Location
| 9:Value = Hospital
| 10:Type = Line
| 10:Label = Date
| 10:Value = Unknown
| 11:Type = Line
| 11:Label = Rewards
| 11:Value =
| 12:Type = Line
| 12:Label = Multiplayer map
| 12:Value =
| 13:Type = Footer
| 13:Value =
}} Medical Emergency is the seventh mission of Modern Combat: Sandstorm. In this level, Lieutenant Warrens attempts to assassinate Abu Bahaa in his hospital room.
Characters[]
Plot[]
Lieutenant Warrens and his squad have infiltrated the hospital where terrorist commander Abu Bahaa is said to be staying. Warrens and his team have orders to kill the terrorist, but not everything is as it seems...
Walkthrough[]
This is another drastic environment change.
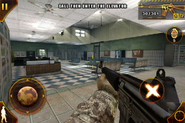
The player starts in a large room. By the door is a Weapons Crate with an AK-47 and a Benelli M4. Pick a weapon set and head out into the hallway. As the players move through the hallways, enemies will use gurneys and various objects as cover. As well, many more enemies will be using the MP5 in this level, which can devastate the player's health, especially when whole groups are using it at once. After a few rooms, a doorway will open in front of the player and they will be attacked by an enemy wielding an MP5. Inside the room, a Weapons Crate also containing an MP5 can be found. Grab it or ignore it and continue on. At the next corner, multiple enemies will attack. To the right of the curving hall, in front of a bench is a box of grenades. Continue down the hall and around the corner. Kill the enemies down the hall. Move to the end of the hall, call the elevator, and prepare for a fight. Grab some cover and take down the enemies that will attack. Most will come from the end of the hall, but one enemy will open a door near the elevator and pop out. After the battle is over, enter that room to find another Weapons Crate with a MN106 and a MP5 inside. Grab any needed weapons and get into the elevator.
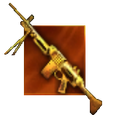
The elevator took the player to the wrong floor, naturally, so for some reason a different elevator across the building needs to be taken. Take out the enemies in the lobby and move into the hallway they came from. Turn right and take out the enemies in the hall. The room on the right has grenades to snatch up, but also two enemies with MP5s. Follow the hallway until more enemies are encountered. TTurn right after that fight, kill the enemies down the hall, the continue straight past them to find a small room with yet another Weapons Crate, this one containing a M249, the first appearance in the series. Swap weapons or leave it and continue. Round the next few corners, kill all enemies, and enter the next elevator.
Exit the elevator and sweep the next few rooms of enemies. Jones needs the player to protect him, so continue through the rooms until the sniper is found and killed. Grab the M40A3 from the Weapons Crate and head to the window. Franky is attempting to help Jones across the parking lot, but enemies are attacking from the building across from the player. Use the M40A3 to protect the two. Continue down the next few hallways to see a brief cutscene.
The player now has 12 minutes to escape, which is rather a lot of time. Essentially, the player must go back the way they came. The route is the same as the way up, except that the elevator is broken, so from the main lobby, you'll need to take the stairs. The stairs are to the left of the elevator. Go through the door and down the stairs to reach the basement area and find Dozer. Follow the hallways back to the starting area to complete the mission.
Equipment[]
- Initial equipment
- Obtainable
Trivia[]
- The hospital has many dozens of covered bodies on beds. These may be enemies killed fighting the player's army, or may be the victims of some sort of pandemic. The large amounts of Biohazard Suit Terrorists suggest the latter.
- This mission serves as the inspiration behind the multiplayer map Bodybags.
Gallery[]
Achievements[]
- I Need a Medic!: Escape the Hospital with 5 or more minutes remaining.
See also[]
| Campaign of Modern Combat: Sandstorm | |
|---|---|
| Missions | Back In Business • Operation Sandstorm • Sand Hits the Fan • Extraction • Death on Wheels • Subterranean Blackout • Medical Emergency • A Nuke Too Far • Underground Compound • The Last Stretch |
| Characters | Lieutenant Warrens • Abu Bahaa • Khris • Vendette • Fox • Ryan • Dozer • Jones • Maurice • Bonnard • Nazair • Coupal • Drouin • Francoeur • LeBlond • Baz • Jackson • Franky |
| Factions | United States Army |


